
In this note, I’ll show you how to do an animated facecam border (or any visual source) without any video editing software needed. The end result will be enteriely customisable with simply two clicks (speed, colors, border radius…).
If you want a detail video explanation or some demo, I’ve prepared a video for you:
How-to
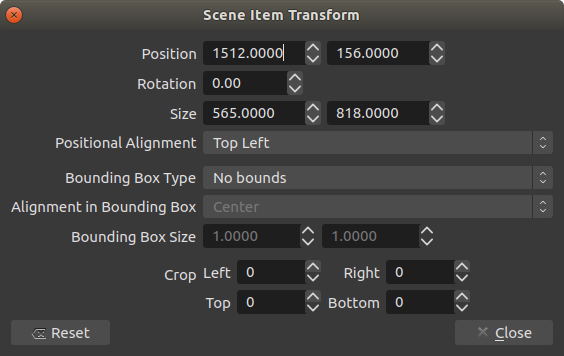
First, find the dimensions of the source you want to border. In my case I’ll do it on my facecam. Right click on the source, go to the
Transform
menu and click
Edit transform...
. In the popup that appear, write down the size of the source. In my case, size is 565px width and 818px height (my format is not standard as I crop my facecam to better fit my background).
Now all you need to do is to add a browser source to the scene where is your facecam (or the source you want the animated border on) and tweak its content with the following data:
-
URL
:
data:text/html, <div><p> - Width and Height : The width and height of your source + the size of the border wanted. For example if your facecam is 800*600 and you want a border size of 20 pixels, write 840 and 640 (20 pixels on each size equals 40 extra pixels).
- Custom CSS :
:root {
  --color-1: rgba(255,0,0,1);
  --color-2: rgba(0,0,255,1);
  --speed: 5s;
  --radius: 10px;
}

* {
  margin: 0;
  padding: 0;
}

body {
  width: 100vw;
  height: 100vh;
}

div {
  position: relative;
  width: 100%;
  height: 100%;
  border-radius: var(--radius);
  overflow: hidden;
}

p {
  position: absolute;
  top: -50%;
  left: -50%;
  content: '';
  width: 200%;
  height: 200%;
  background: linear-gradient(var(--color-1) 40%, var(--color-2) 60%);
  animation: rotation var(--speed) linear infinite;
}

@keyframes rotation {
  0% { transform: rotate(0deg); }
  100%{ transform: rotate(360deg); }
}
In this box, the first lines are variables that you can adjust. Simply change the value to the one you want!
-
gradient-color-1andgradient-color-2are the color of the gradient that will be rotating -
speedis the speed in seconds for a full revolution -
radiusis the border corner radius (0 for sharp angle).
Last but not least, just move this behind your camera and you should see the result!
Have fun!
